Summer in Lexington, OR, is a season that tests the limits of both people and machines. For those in construction, agriculture, and other sectors reliant on heavy equipment, the summer grind presents not only a surge in workload but also an uptick in maintenance concerns. Rising temperatures can push machinery beyond its comfort zone, leading to breakdowns, delays, and costly repairs. Therefore, establishing a robust strategy for heavy equipment repair and maintenance becomes not just a recommendation but a necessity. This blog will explore the nuances of heavy equipment maintenance in Lexington, OR, during the summer, and provide insights into how businesses can keep their operations running smoothly and efficiently through proactive care.
The Summer Strain on Heavy Equipment in Lexington, OR
Lexington, OR, located in Eastern Oregon, is no stranger to harsh seasonal changes. Summers often bring extended heat waves with temperatures that hover in the high 90s and sometimes spike over 100°F. These extreme conditions put immense thermal and mechanical stress on heavy machinery such as bulldozers, excavators, loaders, and harvesters.
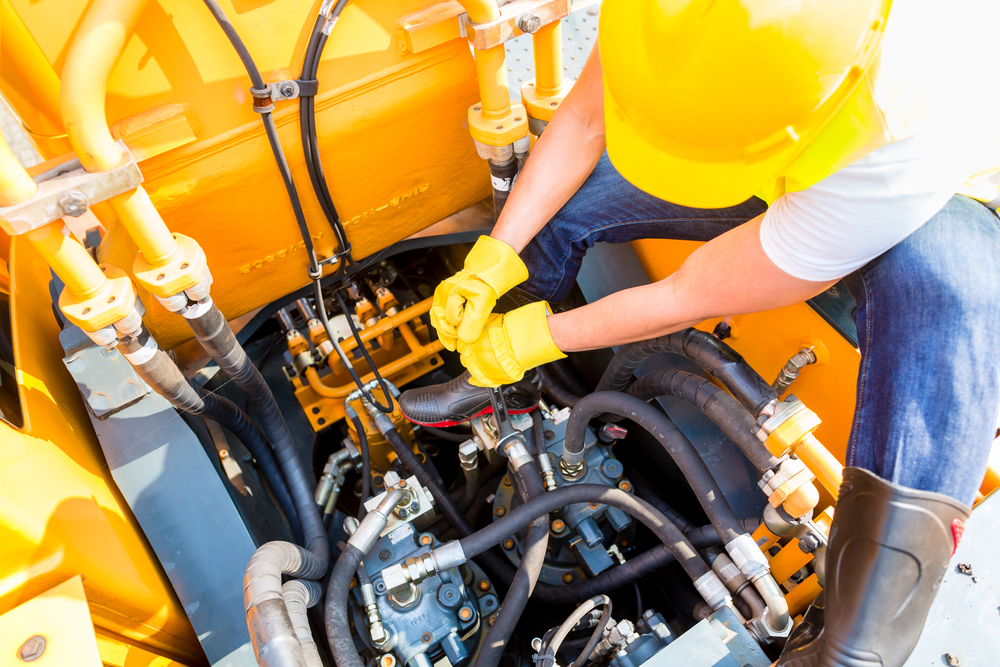
Overheating is one of the most prevalent issues faced during this season. Engine systems are particularly vulnerable, with coolant systems working overtime to regulate heat. Hydraulic systems can also suffer as fluid viscosity changes under high temperatures, leading to pressure drops and component damage. The increased use of equipment during long summer days further accelerates wear and tear, making preventative maintenance not just helpful but critical.
Lexington, OR, heavy equipment maintenance teams must be especially vigilant during these months. Dust and debris from dry, arid conditions can clog filters and cooling systems, while rubber components like hoses and belts are prone to cracking or snapping due to thermal expansion. The result is a higher-than-average risk of mid-operation failure that can set projects back significantly.
Preventative Maintenance: A Seasonal Necessity
One of the most effective ways to tackle summer-induced stress on heavy equipment is through a structured preventative maintenance program. Preventative maintenance, heavy machinery-focused, should begin with an inspection schedule that increases in frequency during the hottest months.
Regular inspections allow for early detection of signs of fatigue in key systems—such as coolant leaks, degraded hydraulic fluid, or worn fan belts. Replacing parts before they fail not only prevents unexpected downtime but also ensures optimal performance under stress. For example, swapping out an aging radiator hose before it bursts in 100°F heat can save hours—if not days—of repair time and project delays.
In Lexington, OR, heavy equipment repair specialists recommend focusing on four major systems during summer: the cooling system, air filtration, lubrication system, and electrical system. Checking and flushing coolant regularly ensures the engine doesn’t overheat. Air filters must be cleaned or replaced more often to prevent dust blockages. Lubrication levels and oil viscosity should be monitored closely, especially as heat can cause oil to thin, reducing its protective properties. Battery terminals and electrical connections need to be free of corrosion and tightly secured, as batteries can be negatively affected by high heat.
Preventative maintenance in Eastern Oregon must also include thorough pre- and post-operation inspections. Operators should be trained to recognize early warning signs—like unusual engine noise, reduced hydraulic response, or overheating indicators on dashboard gauges. Early detection is often the difference between a quick fix and a full-blown repair.
Fighting Overheating: Best Practices for Summer Operation
Heavy equipment overheating prevention in Lexington, OR, hinges on both machine readiness and operator habits. Even well-maintained equipment can overheat if it’s not used correctly under extreme conditions. Therefore, operational adjustments are necessary to help machines cope.
Scheduling work during cooler parts of the day—early mornings and late evenings—can dramatically reduce strain on equipment. When possible, giving machines rest periods throughout the day allows internal systems to cool down, extending both performance and equipment life. Shading parked machinery can also help mitigate radiant heat buildup before startup.
Another often overlooked factor in overheating is the cleanliness of the equipment. Dust buildup on radiator fins and oil coolers can act as insulation, trapping heat instead of allowing it to dissipate. Routine power washing of external components, especially during peak dust conditions in Eastern Oregon, is a simple yet effective countermeasure.
Proper fluid management is equally vital. Ensuring that the engine has the right mixture of water and antifreeze/coolant is crucial. High-quality, temperature-specific hydraulic fluids and motor oils should be selected based on the manufacturer’s summer recommendations. These fluids are engineered to withstand the higher operating temperatures typical in summer workloads.
One must also not ignore tire and track maintenance. Heat can increase air pressure in pneumatic tires, risking blowouts, while excessive friction in rubber tracks due to dry terrain can accelerate tread wear. Keeping these components within optimal operating specifications is part of a holistic overheating prevention strategy.
The Role of Professional Repair Services in Lexington, OR
While in-house preventative maintenance plays a crucial role, professional heavy equipment repair services in Lexington, OR, are indispensable during the summer. Certified technicians bring a deeper understanding of how seasonal stress affects specific makes and models, enabling quicker diagnostics and more reliable repairs.
Local repair shops often have better access to regional parts suppliers, reducing wait times for critical components. Additionally, they offer services like radiator pressure testing, engine diagnostics, and complete fluid analysis—tools that go beyond what standard job site maintenance crews can perform.
Contracting with a local Lexington, OR, heavy equipment maintenance provider for summer check-ups or mobile repair visits can be a game-changer. These professionals can come on-site to perform maintenance or repairs, reducing equipment downtime and avoiding the logistical headaches of transporting large machinery back and forth.
Partnering with a reliable repair company also means you have access to emergency services when breakdowns occur. During the high-demand summer season, this support can be invaluable in keeping projects on schedule and within budget. With the heavy workload and tight deadlines characteristic of Lexington’s summer construction and agricultural calendars, every minute counts.
Looking Ahead: Building a Long-Term Summer Maintenance Strategy
Long-term success in heavy equipment management in Lexington, OR, requires more than a reactive approach to problems—it demands a year-round commitment to planning and preparation. Summer is just one season in the operational life of heavy machinery, but its effects can linger if not properly managed.
As the season winds down, it’s vital to conduct comprehensive post-summer inspections. Look for signs of thermal fatigue in components like gaskets, seals, and hydraulic lines. Assess wear patterns on tires and tracks. Document any overheating incidents, however minor, to guide future maintenance schedules and parts replacement cycles.
The data gathered during summer operations should inform the off-season repair and maintenance strategies. For businesses operating in Eastern Oregon, where winter brings its own unique challenges, this insight ensures your fleet transitions smoothly from one season to the next without compounding issues.
Moreover, developing a digital maintenance log for each piece of heavy equipment can streamline operations, helping track parts lifespans, flag recurrent issues, and predict future failures before they become problems. Integrated telematics systems, now available even in mid-sized construction fleets, can automate many of these tasks, giving fleet managers real-time visibility into equipment performance metrics.
Looking ahead, the demands on heavy machinery in Lexington, OR, will only grow as infrastructure projects expand and agricultural cycles intensify. That makes it more important than ever to embrace a holistic, season-specific approach to maintenance—one that emphasizes preparation, adapts to local conditions, and leverages expert support.
Conclusion
While Lexington’s summer heat poses a formidable challenge, it also presents an opportunity: the chance to strengthen your maintenance practices, extend equipment life, and gain a competitive edge through operational reliability. With proper heavy equipment repair routines, a focus on preventative maintenance, and a deep understanding of overheating prevention specific to Eastern Oregon’s climate, your machinery—and your business—can keep moving forward no matter how high the temperature climbs.
Eastern Oregon’s summer storms are notorious for striking with little warning, transforming sunlit work zones into chaotic landscapes in minutes. Nowhere is this truer than in Lexington, a small but industrious town that serves as a hub for agricultural and construction operations. The region’s volatile summer weather can take a toll on critical machinery, often at the peak of demanding workloads. When a sudden deluge or windstorm damages vital equipment, downtime isn’t just inconvenient—it can halt entire operations. That’s where emergency heavy equipment repair becomes essential.
In this article, we’ll dive deep into how Lexington and surrounding areas of Eastern Oregon manage storm-induced mechanical crises. From immediate storm damage assessment to mobile heavy equipment repair services that operate 24/7, this blog will explore the rapid response strategies that keep work moving, even under the most unpredictable skies.
Lexington’s Weather: The Perfect Storm for Equipment Failure
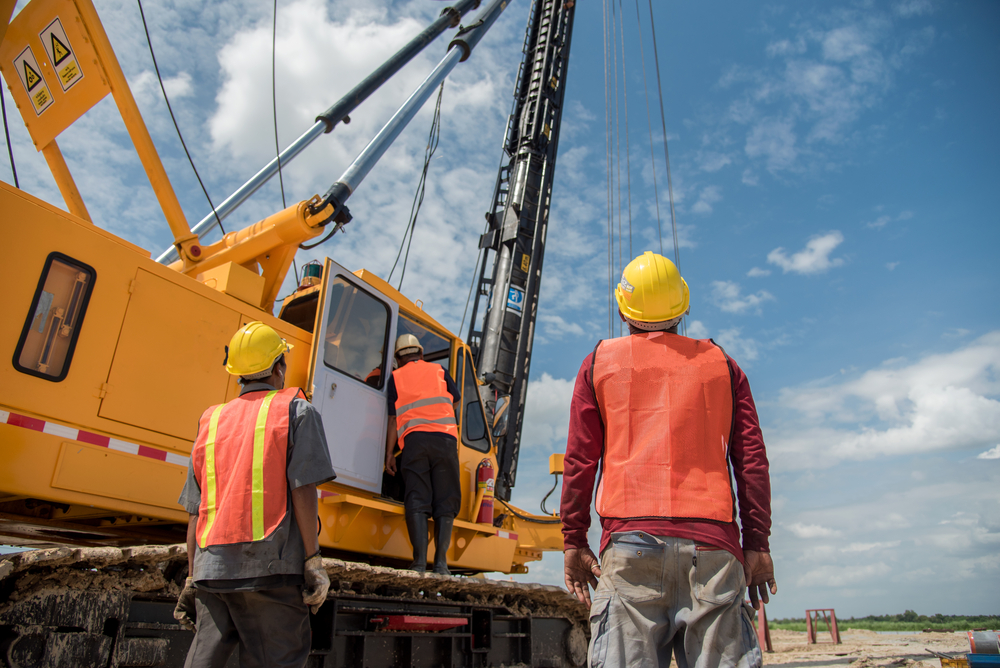
Lexington, Oregon may enjoy its fair share of sunny days, but during the summer, the skies often betray expectations. Thunderstorms, flash floods, and high winds emerge with short notice, making the region’s heavy equipment especially vulnerable. Machines that are typically left outdoors—excavators, backhoes, bulldozers, and cranes—are suddenly pounded by torrential rain, blasted by debris-laden winds, or even struck by lightning.
Unlike milder regions where seasonal storms are predictable and gradual, Lexington’s atmospheric shifts can be violent and abrupt. This volatility increases the likelihood of emergency heavy machinery breakdown scenarios. Hydraulic failures, electronic malfunctions, and fuel system compromises are among the most common outcomes of storm-related wear and tear. For operators and project managers, quick and effective action is not optional—it’s a necessity.
Adding to the challenge is the region’s rural nature. With vast expanses of farmland and rugged terrain, it’s not always feasible—or timely—to haul broken machinery to a central repair facility. Instead, mobile heavy equipment repair in Oregon becomes a lifeline for many operations. When storms strike, it’s these agile services that ensure projects aren’t left in limbo.
The Role of Emergency Heavy Equipment Repair Services
Emergency heavy equipment repair services are the unsung heroes in Lexington’s storm recovery playbook. These teams are trained to respond to breakdowns at a moment’s notice, often traveling through storm-affected routes to reach remote job sites. Their toolkits include diagnostic software, welding rigs, hydraulic repair kits, and an arsenal of replacement parts, enabling them to perform most repairs on-site.
For Lexington, the importance of such mobile units can’t be overstated. A downed harvester during harvest season or a malfunctioning grader during a road repair project can mean thousands of dollars in lost productivity. Emergency heavy equipment repair teams mitigate these losses by restoring machinery functionality quickly, often working in less-than-ideal conditions—from muddy fields to debris-strewn construction sites.
These repair units also play a critical role in assessing whether equipment is safe to operate post-storm. Rather than risking further damage or operator injury, field technicians provide fast storm damage assessments of heavy equipment in Eastern Oregon. This means looking for water ingress in electrical panels, checking for wind-induced misalignment, and testing hydraulic pressure after exposure to extreme temperature changes. When minutes matter, their ability to diagnose and fix problems efficiently makes all the difference.
Mobile Repairs: The Backbone of Rural Resilience
While urban centers may benefit from proximity to large dealerships and service centers, Lexington leans heavily on mobile heavy equipment repair services in Oregon. These services act as traveling workshops, often operating from robust utility trucks that can handle both diagnostic and mechanical tasks. Given the distances and terrain involved, they are indispensable in restoring uptime quickly.
The best mobile services are not just reactive—they’re proactive. They maintain detailed logs of client equipment, allowing them to stock commonly needed parts and anticipate seasonal vulnerabilities. For instance, during storm season, they may carry extra alternators, starter motors, and seals to address the usual suspects in summer breakdowns. Some even offer real-time communication through GPS-enabled tracking and text updates so project managers are never left in the dark about repair timelines.
Lexington’s industries—whether agriculture, road construction, or timber—rely on these services for their speed and versatility. Many mobile heavy equipment repair companies have partnerships with OEMs (original equipment manufacturers), enabling them to perform warranty repairs on the spot. This blend of speed, skill, and logistical savvy empowers Eastern Oregon’s workforce to rebound from storms with minimal lag time.
Storm Damage Assessment: More Than Just a Quick Fix
Storm damage assessment for heavy equipment in Eastern Oregon goes beyond simply checking if a machine will start. It’s a systematic process involving visual inspections, operational testing, and sometimes even fluid analysis. Water contamination in hydraulic systems, unnoticed cracks in boom arms, and damaged sensor arrays can lead to catastrophic failures if not addressed promptly.
Professional assessment teams are trained to spot subtle signs of compromise. For example, corrosion on terminals might not seem like a big deal post-storm, but it can lead to short circuits down the line. Similarly, warped body panels may suggest underlying frame damage. A comprehensive storm damage assessment includes evaluating whether equipment can continue functioning safely or whether temporary fixes might jeopardize long-term reliability.
Lexington operators are increasingly investing in post-storm inspections as a standard operating procedure. This proactive approach reduces the risk of subsequent breakdowns, protects operator safety, and ensures that insurance claims can be substantiated with professional documentation. Some mobile services even offer drone-assisted inspections to access hard-to-reach machinery or hazardous terrain, especially valuable after flooding or landslides.
Building a Storm-Resilient Fleet in Lexington, Oregon
As Lexington’s industries continue to grow, so does the need to future-proof operations against erratic weather. Investing in storm-resilient equipment, while important, is only one part of the equation. Establishing a relationship with reliable mobile heavy equipment repair services in Oregon is equally critical. These partnerships allow for faster response times, better coordination during crises, and access to specialized repair protocols tailored to each machine.
Fleet managers in Lexington are also turning to technology to bolster preparedness. Telematics systems now allow real-time monitoring of engine performance, fluid levels, and GPS tracking—helping detect anomalies before they escalate into full-blown emergencies. Some platforms even integrate weather alerts to notify operators when equipment should be moved, shut down, or secured.
Insurance providers are beginning to take note of these practices. Companies that demonstrate a commitment to storm damage assessment and timely emergency heavy machinery breakdown responses are often eligible for premium reductions. The logic is simple: fewer incidents of catastrophic failure result in fewer claims.
Ultimately, the path to storm resilience is paved with preparation, speed, and precision. For Lexington and its neighboring communities in Eastern Oregon, emergency heavy equipment repair is more than a convenience—it’s a cornerstone of economic survival in an increasingly unpredictable climate.
Conclusion
As the summer season unfolds and the skies remain fickle, one truth holds steady: when nature unleashes its fury, Lexington’s workforce is ready—not just with grit and resolve, but with the tools and expertise needed to recover fast and get back to building, growing, and thriving.
Entering the mechanic trade can be a life-changing decision that offers both financial stability and long-term job satisfaction. With modern infrastructure, agriculture, mining, and transportation industries relying heavily on complex machinery, there’s an ever-growing demand for skilled professionals—especially heavy equipment mechanics. If you’re passionate about fixing engines, enjoy hands-on work, and are looking for a rewarding career, the heavy equipment mechanic career path may be the right one for you.
This guide provides a comprehensive look at how to become a mechanic, with a special focus on the diesel mechanic career and the many opportunities in heavy equipment repair. Whether you’re starting from scratch or switching careers, understanding the essential steps and training required will help you navigate this promising trade.
The Appeal and Scope of the Mechanic Trade
The mechanic trade is more than just turning wrenches. It’s a career that blends technical knowledge with physical skill, problem-solving, and critical thinking. The trade encompasses a wide variety of specializations including automotive repair, diesel engines, marine engines, and—importantly—heavy equipment.
Heavy equipment mechanics focus on repairing and maintaining machinery used in construction, farming, and large-scale industrial operations. Think bulldozers, excavators, cranes, and loaders. These machines are foundational to building roads, digging foundations, and extracting raw materials, making heavy equipment mechanics crucial to the functioning of the modern economy.
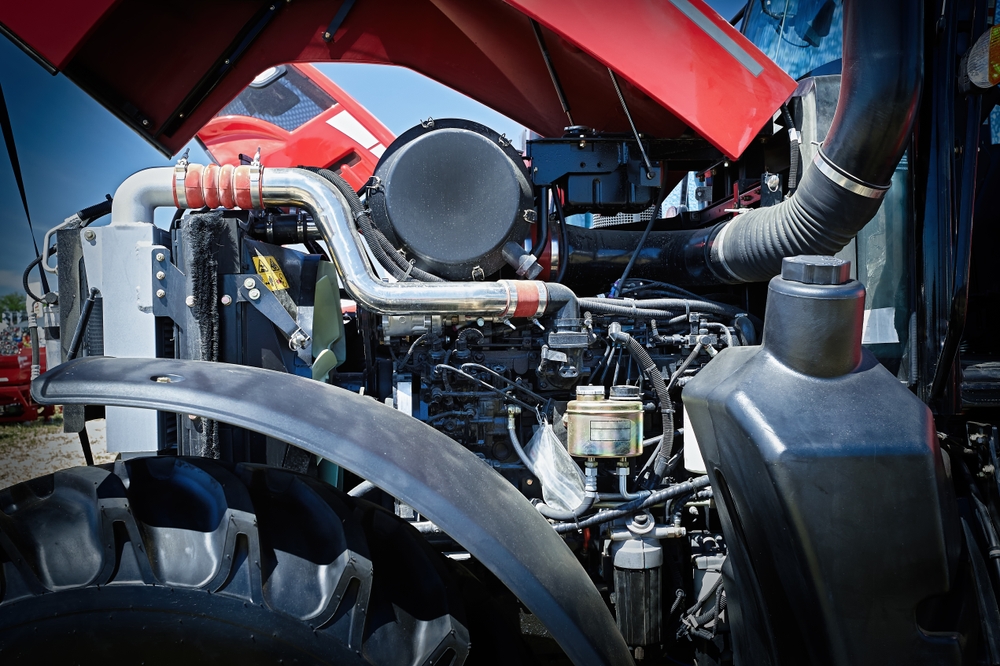
As a heavy equipment mechanic, you’ll be working on powerful diesel engines, hydraulic systems, electrical circuits, and sophisticated computerized control systems. The job is physically demanding and technically challenging, but it also offers excellent compensation, job security, and a sense of accomplishment that few desk jobs can match.
Steps to Enter the Mechanic Trade
Understanding how to enter the mechanic trade, heavy equipment specialization included, begins with a combination of education, hands-on training, and often certification.
The first step is a solid foundation in mechanical knowledge. While some mechanics are self-taught or learn informally, the most reliable and respected path starts with formal training. This could begin as early as high school, with vocational courses in auto repair or diesel technology. For adults, community colleges and technical institutes offer dedicated heavy equipment mechanic training programs that cover everything from engine diagnostics to welding.
These programs typically include both classroom instruction and hands-on shop time. Students learn the fundamentals of diesel engines, hydraulic systems, electrical troubleshooting, and safety protocols. Many training programs also incorporate the use of diagnostic software and computerized tools, which are now industry standard.
After completing your coursework, the next step is often an apprenticeship or entry-level position where you work under the supervision of experienced professionals. Apprenticeships can last 2 to 4 years and provide invaluable real-world experience while you earn a paycheck. It’s during this time that many aspiring mechanics begin to specialize—be it construction equipment, agriculture machinery, or mining vehicles.
The Diesel Mechanic Career Path and Specialization in Heavy Equipment
A diesel mechanic career is the backbone of many sectors, and it offers multiple avenues for specialization. Diesel engines power a majority of the world’s heavy machinery due to their durability and fuel efficiency. As such, most heavy equipment mechanics are also, by necessity, diesel mechanics.
Your career can begin in a generalist role, perhaps servicing fleets of trucks or buses, and then pivot toward heavier machinery as you gain experience. Once you’re skilled in diesel systems, you’ll find that your expertise is in demand in construction companies, mining operations, municipal utilities, and equipment dealerships.
Another key area within the heavy equipment mechanic career path is mobile service. Some companies require mechanics to be on-call to travel to job sites to repair downed equipment. These roles can offer higher pay and more responsibility but require greater independence and troubleshooting skills.
As your career progresses, you might move into supervisory roles, become a shop foreman, or even start your own repair business. Certifications from bodies like the National Institute for Automotive Service Excellence (ASE) or manufacturer-specific training (from brands like Caterpillar or John Deere) can boost your credibility and earning potential.
Training and Certification: Building Blocks of a Successful Career
Heavy equipment mechanic training programs are the bedrock of a strong mechanic career. These programs can be found at community colleges, vocational schools, and specialized trade schools across the country. They typically span 1 to 2 years and may lead to a certificate or associate degree.
Coursework usually includes diesel engine repair, preventative maintenance, hydraulics, brake systems, welding, and blueprint reading. Many programs partner with local employers to provide internships or co-op work experiences, which are crucial for building both skills and connections in the industry.
After initial training, it’s highly recommended to pursue certification. ASE certification is widely recognized and may be required by some employers. Specialized certifications in areas like diesel engines, brakes, and electrical systems show potential employers that you’re serious about your profession and committed to excellence.
In addition, manufacturers often provide advanced training specific to their equipment. Earning credentials from Caterpillar, Komatsu, or Volvo can position you as a top-tier mechanic within dealership networks or specialized service providers.
The heavy equipment field is also increasingly tech-driven. Learning how to use diagnostic software and electronic control systems is no longer optional—it’s essential. As such, staying current with emerging technologies through continued education and training workshops is key to a successful, long-term career.
Career Outlook and Long-Term Opportunities in the Mechanic Trade
The future is bright for those pursuing a heavy equipment mechanic career path. According to labor market forecasts, employment for diesel mechanics and heavy equipment technicians is projected to grow steadily due to ongoing demand in infrastructure development, resource extraction, and agriculture.
Wages are competitive. Entry-level technicians might earn between $40,000 and $50,000 per year, with experienced professionals commanding salaries upwards of $70,000 or more. Mobile service mechanics, those with specialized certifications, and individuals working in remote or high-demand areas can earn even more.
Beyond wages, the job offers other benefits—chief among them is job stability. The skills learned in heavy equipment repair are transferable across industries and locations, making it easier to find employment or change employers without starting from scratch.
There’s also a strong sense of pride and purpose. Knowing that the equipment you maintain helps build cities, feed populations, or power industries adds a tangible value to your day-to-day work. For many, this sense of contribution is deeply fulfilling.
As you advance, opportunities expand. Experienced mechanics can move into technical training, sales of equipment and parts, shop management, or equipment inspection and diagnostics. Some even transition into engineering support roles, helping design better service protocols or advise on equipment improvements based on real-world performance data.
Conclusion
For those interested in how to become a mechanic with a specialization in heavy machinery, the pathway is structured but full of opportunities. Begin with training, immerse yourself in the technical aspects of diesel engines and hydraulics, earn certifications, and embrace lifelong learning. With determination and hands-on experience, a fulfilling and well-paying career in the mechanic trade is well within reach.
Oregon’s diverse agricultural industry is one of the state’s most vital economic engines. With crops ranging from wheat and alfalfa to onions, hops, and cattle, the agricultural sector fuels both local communities and broader markets across the U.S. and beyond. But behind every successful farm and ranch in the state lies a key component often overlooked: the skilled hands of heavy equipment mechanics. These professionals ensure that tractors, combines, balers, irrigation systems, and other complex farm machinery keep running without interruption. As the demand for agricultural productivity grows, so too does the need for qualified individuals in this critical field. If you’re searching for a meaningful and rewarding profession, the agricultural mechanic role in Oregon offers stability, growth, and a deep sense of purpose.
Oregon Agriculture’s Growing Dependence on Machinery
As technology continues to revolutionize agriculture, Oregon farms are increasingly relying on advanced machinery to increase yields, reduce labor costs, and stay competitive. In regions like Eastern Oregon and Lexington, where large-scale operations are common, farm machinery plays a central role in every season—from seeding and tilling to harvesting and transporting.
This mechanization is not merely a convenience; it is a necessity. Without reliable equipment, the entire agricultural cycle can be jeopardized, causing costly delays and potential loss of product. That’s where agricultural machinery repair specialists come into play. Heavy equipment mechanics ensure that these machines run smoothly, conducting preventative maintenance and emergency repairs as needed. For those interested in becoming an agricultural mechanic in Oregon, the opportunities to make a tangible difference are plentiful and highly valued within the farming community.
The Critical Role of Heavy Equipment Mechanics
Heavy equipment mechanics are the unsung heroes of the agricultural industry. Their responsibilities extend far beyond basic tool usage. These professionals are trained to troubleshoot, diagnose, and repair complex mechanical, hydraulic, and electrical systems. They must understand the inner workings of everything from diesel engines to GPS-guided planting equipment. In many cases, they are the difference between a farm staying on schedule or facing financial loss due to downtime.
In agricultural hubs like Lexington, Oregon, mechanics often work in both shop and field settings, traveling directly to farms to perform critical repairs. Their work supports every link in the food production chain. Whether it’s replacing worn-out components in a hay baler or ensuring that irrigation pumps function properly during a drought, farm equipment repair in Oregon is a job with real impact.
Moreover, the increasing use of high-tech machinery requires mechanics to stay up to date with evolving equipment. This has transformed the profession into a dynamic career path that requires a mix of traditional mechanical know-how and digital proficiency. For individuals looking for a hands-on job that never gets dull, heavy equipment mechanic jobs in Lexington, Oregon, and similar areas provide the perfect challenge.
Career Opportunities and Training in Eastern Oregon
One of the most promising aspects of entering the agricultural machinery repair career in Oregon is the breadth of training and employment opportunities available. Technical schools and community colleges across the state offer programs specifically designed for aspiring farm equipment technicians. These programs often include instruction in diesel technology, hydraulics, electrical systems, and diagnostics—ensuring graduates are job-ready.
In Eastern Oregon, where agriculture is a year-round industry, skilled mechanics are in particularly high demand. Employers range from family-owned farms and equipment dealerships to large agricultural corporations and government agencies. As many experienced technicians begin to retire, the industry is actively seeking new talent to fill these essential roles.
Farm equipment technician jobs in Eastern Oregon come with a range of benefits, including competitive pay, steady hours, and opportunities for advancement. Entry-level positions provide on-the-job training, while experienced mechanics can move into supervisory roles or even start their own repair businesses. Additionally, because the role is so integral to the success of agricultural operations, job security tends to be strong even during economic downturns.
Building a Long-Term Career in a Vital Industry
Choosing a career as an agricultural mechanic is more than just finding a job—it’s joining a community and becoming a cornerstone of one of Oregon’s most essential industries. These roles offer more than financial stability. They provide the satisfaction of solving real-world problems and helping farms thrive.
Unlike some professions that are easily automated or outsourced, heavy equipment mechanic jobs demand local expertise and hands-on skills that cannot be replaced by machines or moved overseas. This means that agricultural mechanics can build long-lasting careers in their own communities. It also allows them to form strong relationships with the farmers and business owners they serve, creating a sense of purpose and pride in their work.
Mechanics in this field often describe their job as a blend of science, engineering, and detective work. Every day brings new challenges—whether it’s fixing a tractor engine in the middle of harvest or diagnosing a failing transmission system on a combine. This dynamic environment keeps the work engaging and offers continual learning opportunities for those passionate about machinery and innovation.
The Future is Bright for Agricultural Mechanics in Oregon
As Oregon’s agricultural sector continues to evolve, so too will the demand for well-trained and adaptable mechanics. Climate change, rising food demands, and new environmental regulations will require even more advanced equipment—and even more knowledgeable professionals to maintain it. This makes the agricultural machinery repair career in Oregon not only relevant today but increasingly vital in the years to come.
For those with mechanical aptitude, a desire to work outdoors, and a passion for supporting local food systems, this is a career path worth exploring. Whether you’re just entering the workforce or looking to make a mid-career shift, farm equipment technician jobs in Eastern Oregon and beyond offer the chance to grow professionally while making a lasting impact.
Conclusion
Heavy equipment mechanics are truly the backbone of Oregon’s agricultural engine. They ensure that fields are planted on time, crops are harvested efficiently, and rural economies remain vibrant. Their skills are irreplaceable, and their career prospects are only getting brighter. If you’re seeking a job that combines hands-on work, technical knowledge, and community importance, becoming an agricultural mechanic in Oregon could be your ideal next step.
The picturesque scenery and arid climate of Lexington, Oregon make it a beautiful place to live and work, but for heavy equipment operators and construction professionals, the region’s dusty summer months pose a serious threat to machinery. Dry, dusty environments are a nightmare for engines and mechanical systems, especially in rugged industries such as construction, mining, and agriculture. With the right dust control and air filtration strategies, however, you can dramatically extend the life of your equipment and protect your investments.
Dust control and air filtration protecting heavy equipment engines isn’t just about extending engine life—it’s about maintaining peak performance, reducing downtime, and cutting operational costs. Lexington summers, often hot and dry, create perfect storm conditions for airborne particles to infiltrate and damage engine components. Fortunately, through a combination of proactive maintenance and smart filtration choices, businesses can stay ahead of dust-related engine issues and keep their heavy equipment in prime condition year-round.
Dust and Its Impact on Heavy Equipment Engines
Dust may seem like a harmless annoyance, but it is one of the most pervasive and damaging elements for any mechanical system. In Lexington, OR, summer brings relentless winds and dry spells that send clouds of fine dust into the air, often invisible to the naked eye. This fine particulate matter has a remarkable ability to infiltrate engine compartments, lodge into filters, and abrade internal components.
Heavy equipment engines are particularly vulnerable because they rely on precise tolerances and clean air intake systems to function efficiently. When dust enters an engine’s air intake, it accelerates wear on components like cylinders, pistons, valves, and bearings. Over time, this contamination leads to increased oil consumption, decreased compression, loss of power, and ultimately, engine failure.
The risks are amplified during Lexington summers, when extended hours of operation and dry conditions push engines to their limits. Whether you’re operating excavators, loaders, tractors, or bulldozers, without rigorous air filtration and dust control protocols, you’re effectively reducing the service life of your equipment every time you start the engine.
Why Air Filtration is Crucial in Lexington’s Dusty Climate
Air filtration in heavy equipment serves as the first line of defense against dust intrusion. A high-quality air filter traps airborne contaminants before they enter the engine, maintaining a clean and stable airflow essential for combustion. The key is using filters specifically designed to handle high-dust environments like those found during Lexington summers.
Selecting the best air filters for heavy equipment in dusty conditions, Oregon operators must look for models rated for extreme environments. These often feature multi-stage filtration systems that include a primary and secondary filter. The primary filter captures large particles, while the secondary ensures any remaining microscopic debris is caught before reaching the engine.
Regular inspection and replacement of air filters are just as important as the filters themselves. Even the best filter becomes ineffective when clogged. Operators should adopt a strict maintenance schedule during the peak summer months, ensuring filters are checked daily and replaced as needed to prevent airflow restriction and engine strain.
Beyond traditional filters, pre-cleaners and centrifugal air filtration systems can be added to heavy equipment to enhance dust separation. These systems use inertial forces to spin out dust before it even reaches the filter element, dramatically extending filter life and reducing maintenance demands.
Dust Control Strategies on Job Sites: Minimizing Exposure
In addition to optimizing air filtration, dust control on the job site plays a pivotal role in protecting heavy equipment. Effective dust control reduces the volume of airborne particles, thereby lowering the amount of dust that filters need to handle and minimizing exposure for both equipment and operators.
Water trucks, misters, and chemical suppressants are commonly used to keep dust levels down on active job sites. In Lexington, where water resources may be limited in summer, targeted application of dust suppressants to high-traffic areas can be especially effective. Graveling access roads, reducing vehicle speeds, and rotating site traffic patterns can also help reduce dust generation.
Another key aspect of dust control involves careful planning and preparation. Clearing and grading activities should be scheduled during cooler parts of the day when winds are typically lower. Additionally, barriers such as fencing or vegetation windbreaks can shield sites from prevailing winds, further reducing dust spread.
Employing a site-specific dust control plan not only improves working conditions but also preserves your heavy equipment’s performance. By attacking the problem at its source, you significantly cut down on the dust load your filtration systems need to handle, resulting in less wear and longer equipment life.
Best Practices: How to Prevent Dust Damage to Heavy Equipment Engines in Lexington, OR
Preventive maintenance and proactive monitoring are at the heart of effective dust control and air filtration strategies. To truly understand how to prevent dust damage to heavy equipment engines, Lexington, OR operators must view maintenance as a continuous cycle rather than a reactive response.
Daily pre-operation checks are non-negotiable in dusty environments. These checks should include visual inspections of air filters, seals, engine compartments, and intake ducts. A simple tear in an intake hose or a loose seal can allow dust to bypass filtration systems entirely, rendering even the best filters useless.
Oil analysis is another essential practice. By monitoring the oil for signs of silica and other abrasive contaminants, technicians can detect early signs of dust ingress and address the issue before engine damage becomes irreversible. Keeping detailed maintenance logs helps identify patterns and problem areas, allowing teams to make data-driven decisions.
Cabin air filters and HVAC systems should not be neglected either. Dust infiltration into operator cabins not only affects comfort but can damage sensitive electronics and reduce visibility if left unchecked. Ensuring sealed cabins and properly functioning ventilation systems adds another layer of protection, both for machines and operators.
When selecting equipment, look for models with enhanced sealing and filtration options. Modern machines often come with upgraded dust protection packages that include reinforced engine enclosures, pre-cleaners, and enhanced air intake routing designed to resist dust penetration.
Long-Term Value: Investing in Equipment Protection and Operational Efficiency
While some may view air filters and dust suppression efforts as additional expenses, the long-term savings from reduced downtime, lower repair costs, and extended engine life far outweigh the initial investment. Dust control and air filtration protecting heavy equipment engines is not a luxury—it is an operational necessity in environments like Lexington.
Operators who prioritize dust control strategies and invest in the best air filters for heavy equipment in dusty conditions, Oregon’s challenging climate, reap the rewards in equipment longevity and reliability. More uptime means more productivity, fewer emergency repairs, and increased project efficiency.
In a competitive industry where every dollar counts, protecting your assets should be a top priority. Smart filtration and dust control practices are proven, cost-effective methods to ensure your heavy machinery continues to perform at its best—even through the driest and dustiest Lexington summers.
Conclusion
Ultimately, the health of your heavy equipment reflects the health of your operations. By understanding the dangers of dust, investing in proper air filtration systems, implementing site-wide dust control strategies, and embracing preventive maintenance, you set the foundation for long-term success. Lexington may bring its share of summer challenges, but with the right preparation, your engines will remain strong, clean, and ready to tackle whatever comes next.